Hello and welcome to this quick tutorial about working with Stacks.
First of all, you might be wondering: What is Stacks?
Stacks is a Drupal 8 module that allows you, or a content editor, to easily create complex pages.
The main concept around Stacks are the widgets. The widgets are modular, themeable, and reusable pieces of content. They can hold text, images, video, and audio and are easily plugged into your articles and pages. Stacks’ components are also flexible. If you are a Drupal developer, you can add some code to create your own custom widgets.
Before jumping into this Widget guide, you have to make sure Stacks is successfully installed on your website. For more information about installation, you may read the Readme file inside the module or watch our walkthrough video here.
Once you have set up Stacks, creating widgets is a simple 4 step process.
In this guide, we will create a basic widget from scratch by creating its respective fields, files, and code. In this guide, our example will be a Call to Action widget with 3 fields and its template.
Go to Structure > Stacks page.
Select Manage widget bundles option and click on Add Widget Entity type.
Fill in the widget name you like. In this example we’ll name it Call to Action.
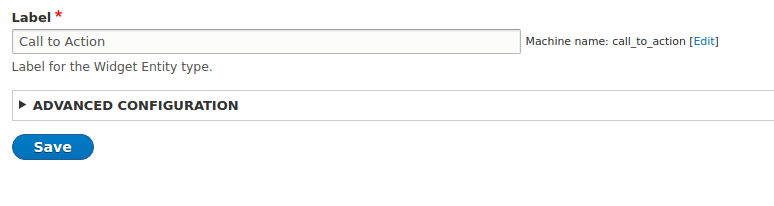
Once you save it, it will appear on the Widget Entity Type list so you can start working with it.
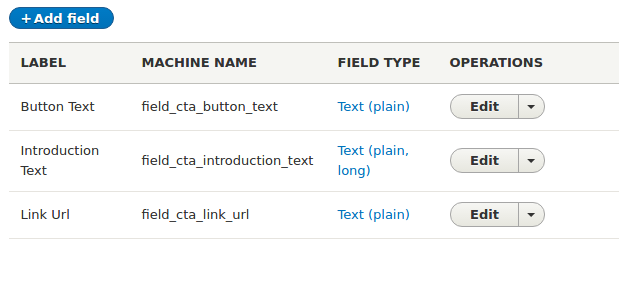
From the list, select Manage Fields options of your new widget to add your custom fields.
In this example, we will create a Button Text field, a Link URL field, and an Introduction Text field.
If we want our widget to take effect, we’ll have to update the content type where we are using Stacks.
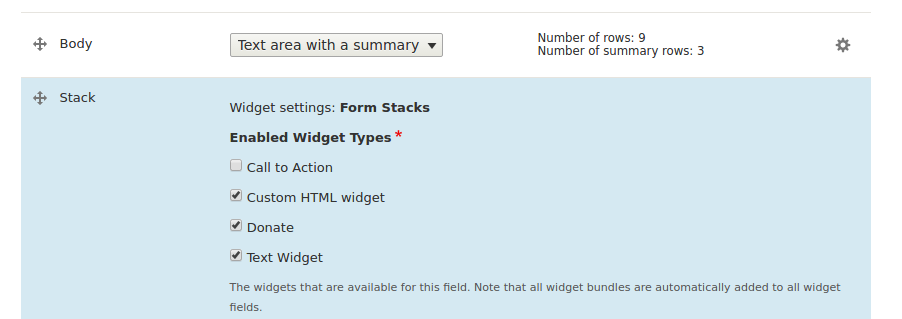
To do this, go to Structure > Content Types and select the Manage Form Display option from your content type.
Click on the gear button to update the Stacks field options and check your new widget. This way, it will be included for usage on the node.
Update and Save the configuration.
Once we have done above’s steps, we can go directly to our node, where Stacks field was set up, and we just have to click on Add a New Widget button.
Our Call to Action widget will appear now on the Widget Type select list.
Select it and add a custom name for it. Then click Next.
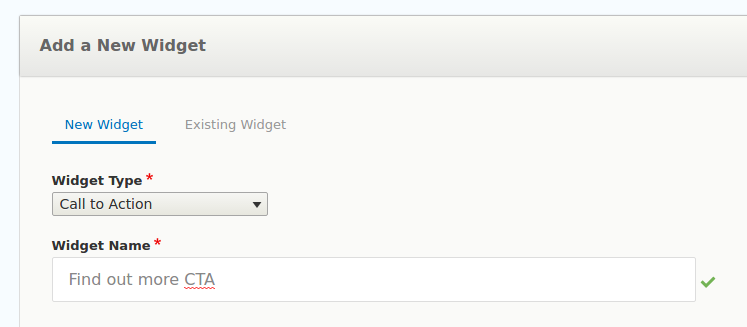
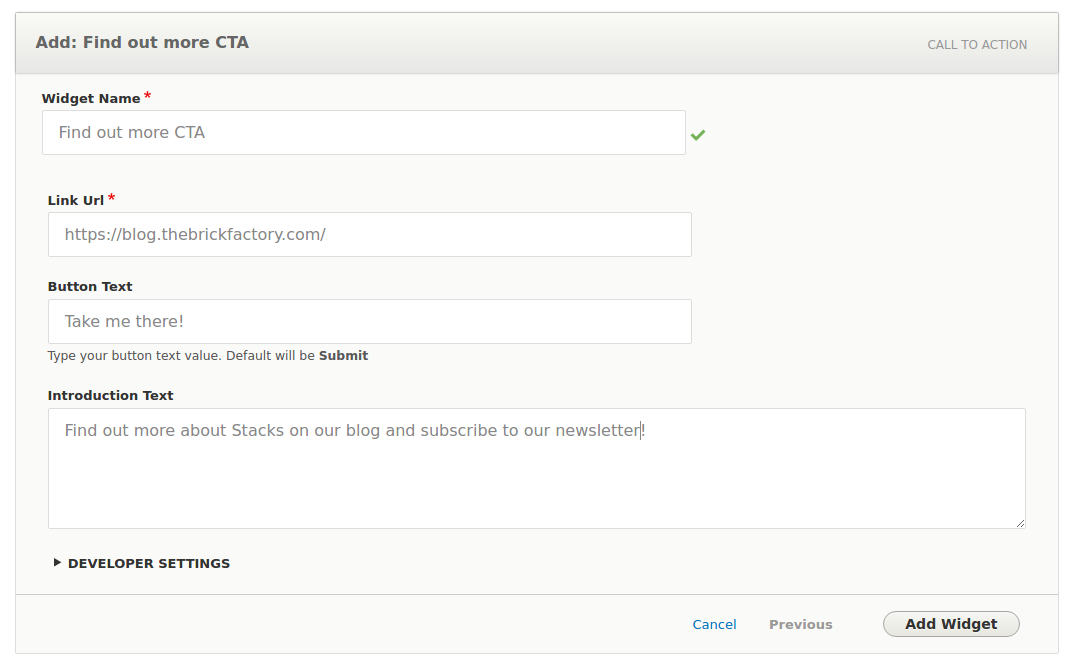
Now we are ready to set up our new widget’s information with the fields we already created.
After we complete all fields, we just have to click on Add Widget button.
Go to your theme and locate the Stacks folder.
Create your new widget folder with your widget’s machine name (Our example: “call-to-action”) and its respective templates folder inside it.
Inside our new templates folder, create your twig file using your widget’s machine name, example: call-to-action–default.html.twig.
Your folders and file structure should look something like this:
-> Stacks
—> call-to-action
—–> templates
——-> call-to-action–default.html.twig
Since our example widget has no variant, we’ll use the default nomenclature.
Note: You can also check the Stacks examples to guide you.
We’ll output the widget’s fields on the template with a custom html as needed.

Our frontend will look something like this:

Once we have our output ready, we just need to apply some styles and that’s it!

Remember that you can add your custom Classes or ID to the widget’s wrapper under the Developer Settings on the widget edition.
I hope you enjoyed this ride! See you next time!
Sign up today to have our latest posts delivered straight to your inbox.