In the Spring Google launched a paid A/B testing product called Google Optimize 360 and in October they announced a free tool called Optimize. Optimize is still in private beta, but I was fortunate enough to get an invite in early December.
I’ve been playing with Optimize on our own website ever since and think it is fantastic. The product is powerful, easy-to-use and includes nice integrations with Google Analytics. At zero charge, it provides most of the features and functionality you find in pricey paid alternatives.
What follows is a review of Optimize, using a simple experiment I ran on our own website as the example.
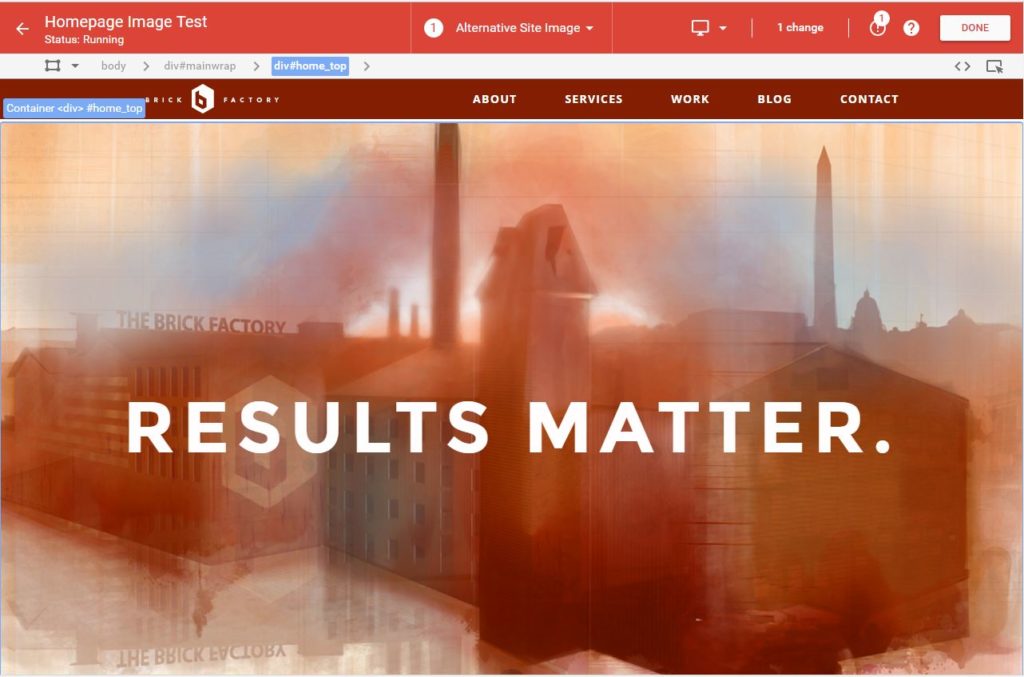
Ever since we launched the Brick Factory, an illustration of a factory on a DC landscape has been a part of our brand identity. The illustration is the centerpiece of our site’s homepage and is featured on our proposal covers. We even have a painting of the factory in our office.
We are in the process of redesigning our company website and experimenting with new versions of the illustration. I thought that testing the new factory vs. the old one would be a great way to get some intel for the redesign while also trying out Optimize.
Below are the original and test images.

Optimize requires some minor set up work before you can start using it. Assuming you are already have Google Analytics installed, all you need to do is add a single line of Optimize code to your Analytics javascript snippet.
Optionally, you can connect Optimize to your Analytics account so the two tools can share data. For reason I details later in the post, I recommend connecting Optimize to Analytics.
Once you get your account set up you can immediately start running tests (called experiments in Optimize). There are three different types of tests you can choose from:
My example experiment is a simple A/B test.
The next step is to create the variant you want to test. The interface for creating variants is easy-to-use for anyone with basic HTML experience. It should be very familiar to those of you using Chrome DevTools or a similar program regularly.
Using a visual interface, you select the area you are interested in editing (I clicked on the div housing our factory image). After you make the selection, you are provided with quick tools you can use to make simple edits to text, typography and orientation. You don’t need to know HTML to make these types of simple changes.
If you click on the Edit Element button you are provided with more advanced options. I chose to edit the HTML of the div directly. I flipped out the image and changed the color of the tagline area from black to white. After saving I immediately see the results of my changes. I click the “Done” button and I’m good to go.
After you create your experiment, you need to create your objectives and to select what audiences you want to target.
Objectives are the metrics you want to use to judge the success or failure of your experiment. Google Optimize includes Pageviews, Bounces and Session Duration as default objective options. Assuming you have connected Optimize to your Analytics account, you can also test against the custom goals you have created for your site. The default objectives are pretty limited, so you’ll want to set up Goals to handle tests that involve conversion tracking, for example.
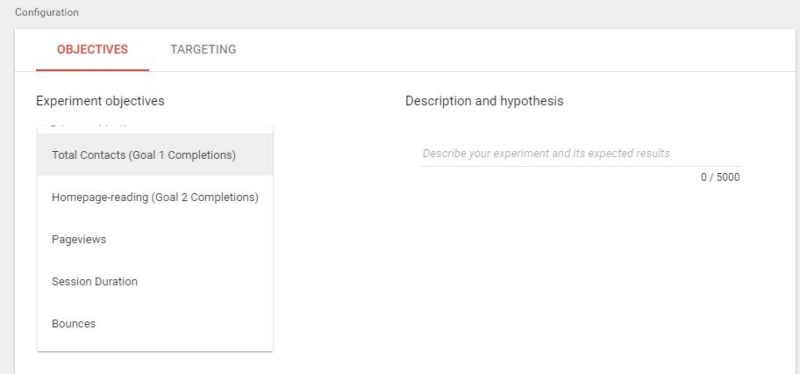
You can track up to three objectives for an individual experiment. For my test, I chose to track Bounces, Pageviews and our custom Homepage-reading goal. The Homepage-reading goal tracks what percentage of users scroll to the bottom of the homepage.
After choosing your objectives, you select which users you want to target. You have the option to customize the percentage of users who participate in the test and the percentage that see each variant. There is also a powerful interface you can use to select which users see your test. You can target by a myriad of criteria such as geography, referrer and browser type.
For my test, I wanted to target visitors who had never been to our site before. Figuring out how to target new visitors wasn’t super intuitive, but Optimize has a good help section so I eventually got it.
Given how powerful the targeting options are, it would be fairly easy to use Google Optimize for personalization as well as for testing. As an example, I could use Optimize to show a different image and messaging to repeat visitors vs. new ones, to customize language for visitors coming from specific emails and to customize calls to action based on location. The possibilities are basically endless.
The Optimize reporting section is straightforward and extremely easy to use. You can view the reports in Optimize or in the Behavior>Experiments section of your connected Google Analytics account.
When viewing your experiment report the first thing you see is an improvement overview that compares your variation to the original. As you will see, the alternate factory image is outperforming the original in our test.
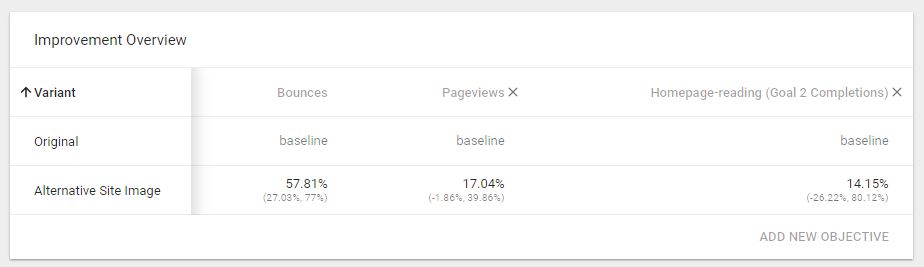
The reports area also lets you do a deep dive on each objective. Here is the report for our pageviews objective.
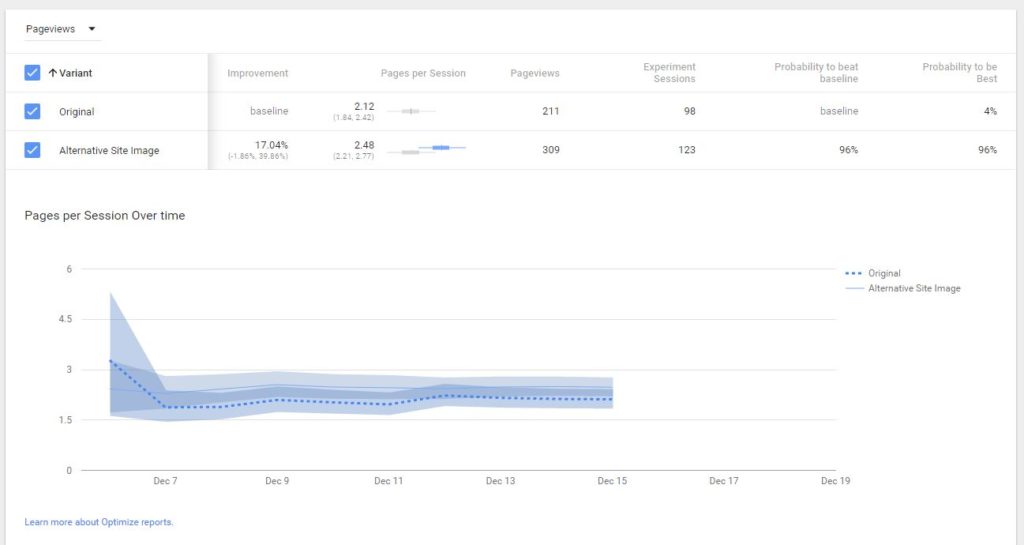
As you can see, the average visitor who saw the original image visited 2.12 pages during their session. The average visitor who saw the new image visited 2.48 pages, representing a 17% improvement. There is a 96% chance that our new image will outperform the original for the pageviews metric.
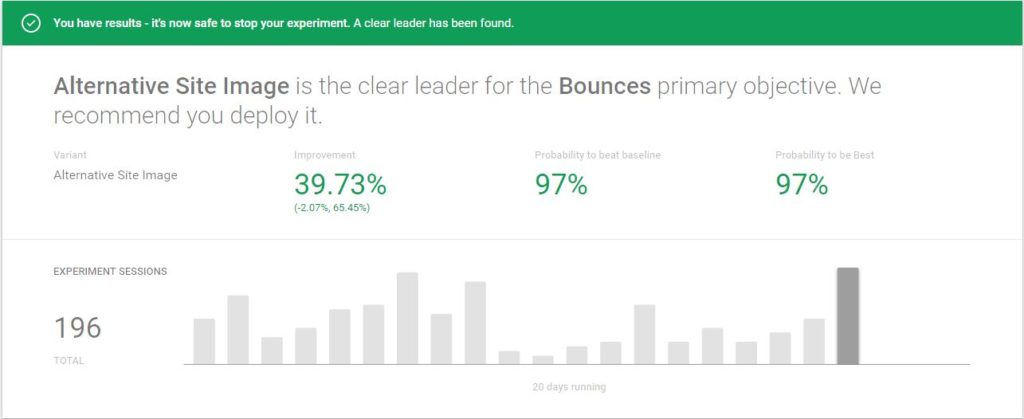
Update: Note after your test has been running for a certain length of time Optimize will post a definitive recommendation about the experiment. Here is an example of what that screen look like.
There are tools out there such as Optimizely that are just as easy-to-use as Google Optimize and that have more features. However, at $1,000+ per month these tools are too expensive for many. Google Optimize is, by far, the best free testing solution I’ve come across. It will allow organizations with limited budgets to run tests and experiment with personalization.
Google Optimize will bring A/B testing to the masses.
Sign up today to have our latest posts delivered straight to your inbox.